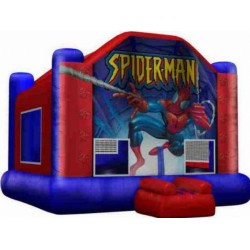
How to repair small tears in a bouncy castle?

Bouncy castles are a source of joy and entertainment for children at parties and events. However, like any inflatable, they can sometimes develop small tears or punctures. In Canada, where outdoor activities are common, knowing how to repair these minor damages can extend the lifespan of your bouncy castle and ensure a safe play environment. Here’s a step-by-step guide on how to repair small tears in a bouncy castle.
1. Gather Your Supplies
Before starting the repair, make sure you have the following supplies on hand:
- Repair patch kit (specifically for inflatables)
- Scissors
- Rubbing alcohol or cleaning wipes
- Cloth or sponge
- Marker or pen
- Measuring tape (if necessary)
2. Locate the Tear
Carefully inspect the bouncy castle to identify the location and size of the tear. For best results, ensure the inflatable is fully deflated before starting the repair process. Mark the area around the tear with a marker so you can easily locate it during the repair.
3. Clean the Area
Before applying a patch, it’s crucial to clean the area around the tear. Use rubbing alcohol or cleaning wipes to remove dirt, dust, and debris. This step ensures better adhesion of the repair patch and helps prolong the repair’s effectiveness.
4. Cut the Patch
Using the repair patch kit, cut a patch that is at least 2-3 inches larger than the tear on all sides. This extra material ensures a secure bond and prevents further tearing. If your patch kit includes specific instructions, be sure to follow them closely.
5. Apply the Patch
Peel off the backing of the patch (if applicable) and place it over the tear, ensuring that it is centered. Press down firmly to eliminate any air bubbles and ensure proper contact with the surface of the bouncy castle. If using a liquid adhesive, apply it around the edges of the patch and press down securely.
6. Allow to Cure
Once the patch is applied, it’s essential to let it cure for the recommended time according to the patch kit instructions. This step is crucial for achieving a strong bond. Avoid inflating the bouncy castle until the adhesive has fully set.
7. Test the Repair
After the patch has cured, carefully inflate the bouncy castle to check the repair. Monitor the area for any signs of air leakage. If you notice any issues, reapply the patch or consider reinforcing it with additional adhesive.
8. Prevent Future Damage
To help prevent future tears and prolong the life of your bouncy castle, consider implementing the following tips:
- Regularly inspect the inflatable for any signs of wear or damage.
- Avoid sharp objects near the bouncy castle.
- Ensure that the setup area is free of debris and sharp edges.
- Teach children to play gently and follow safety rules while using the inflatable.
Conclusion
Repairing small tears in a bouncy castle is a straightforward process that can be done with the right tools and a bit of care. By following these steps, you can ensure that your inflatable remains safe and fun for kids to enjoy. Regular maintenance and prompt repairs will help extend the lifespan of your bouncy castle, keeping the good times rolling!


Leave a Comment